作者:MeshCloud脉时云公有云架构师 严大淇
概览
GCS作为CDN源站是一种常见的场景,为了对存储桶里的文件访问进行保护,所以会将存储桶设置为私有权限,接入CDN无法访问,可以使用签名URL,这样只要携带签名就会获得限时的资源访问权限。
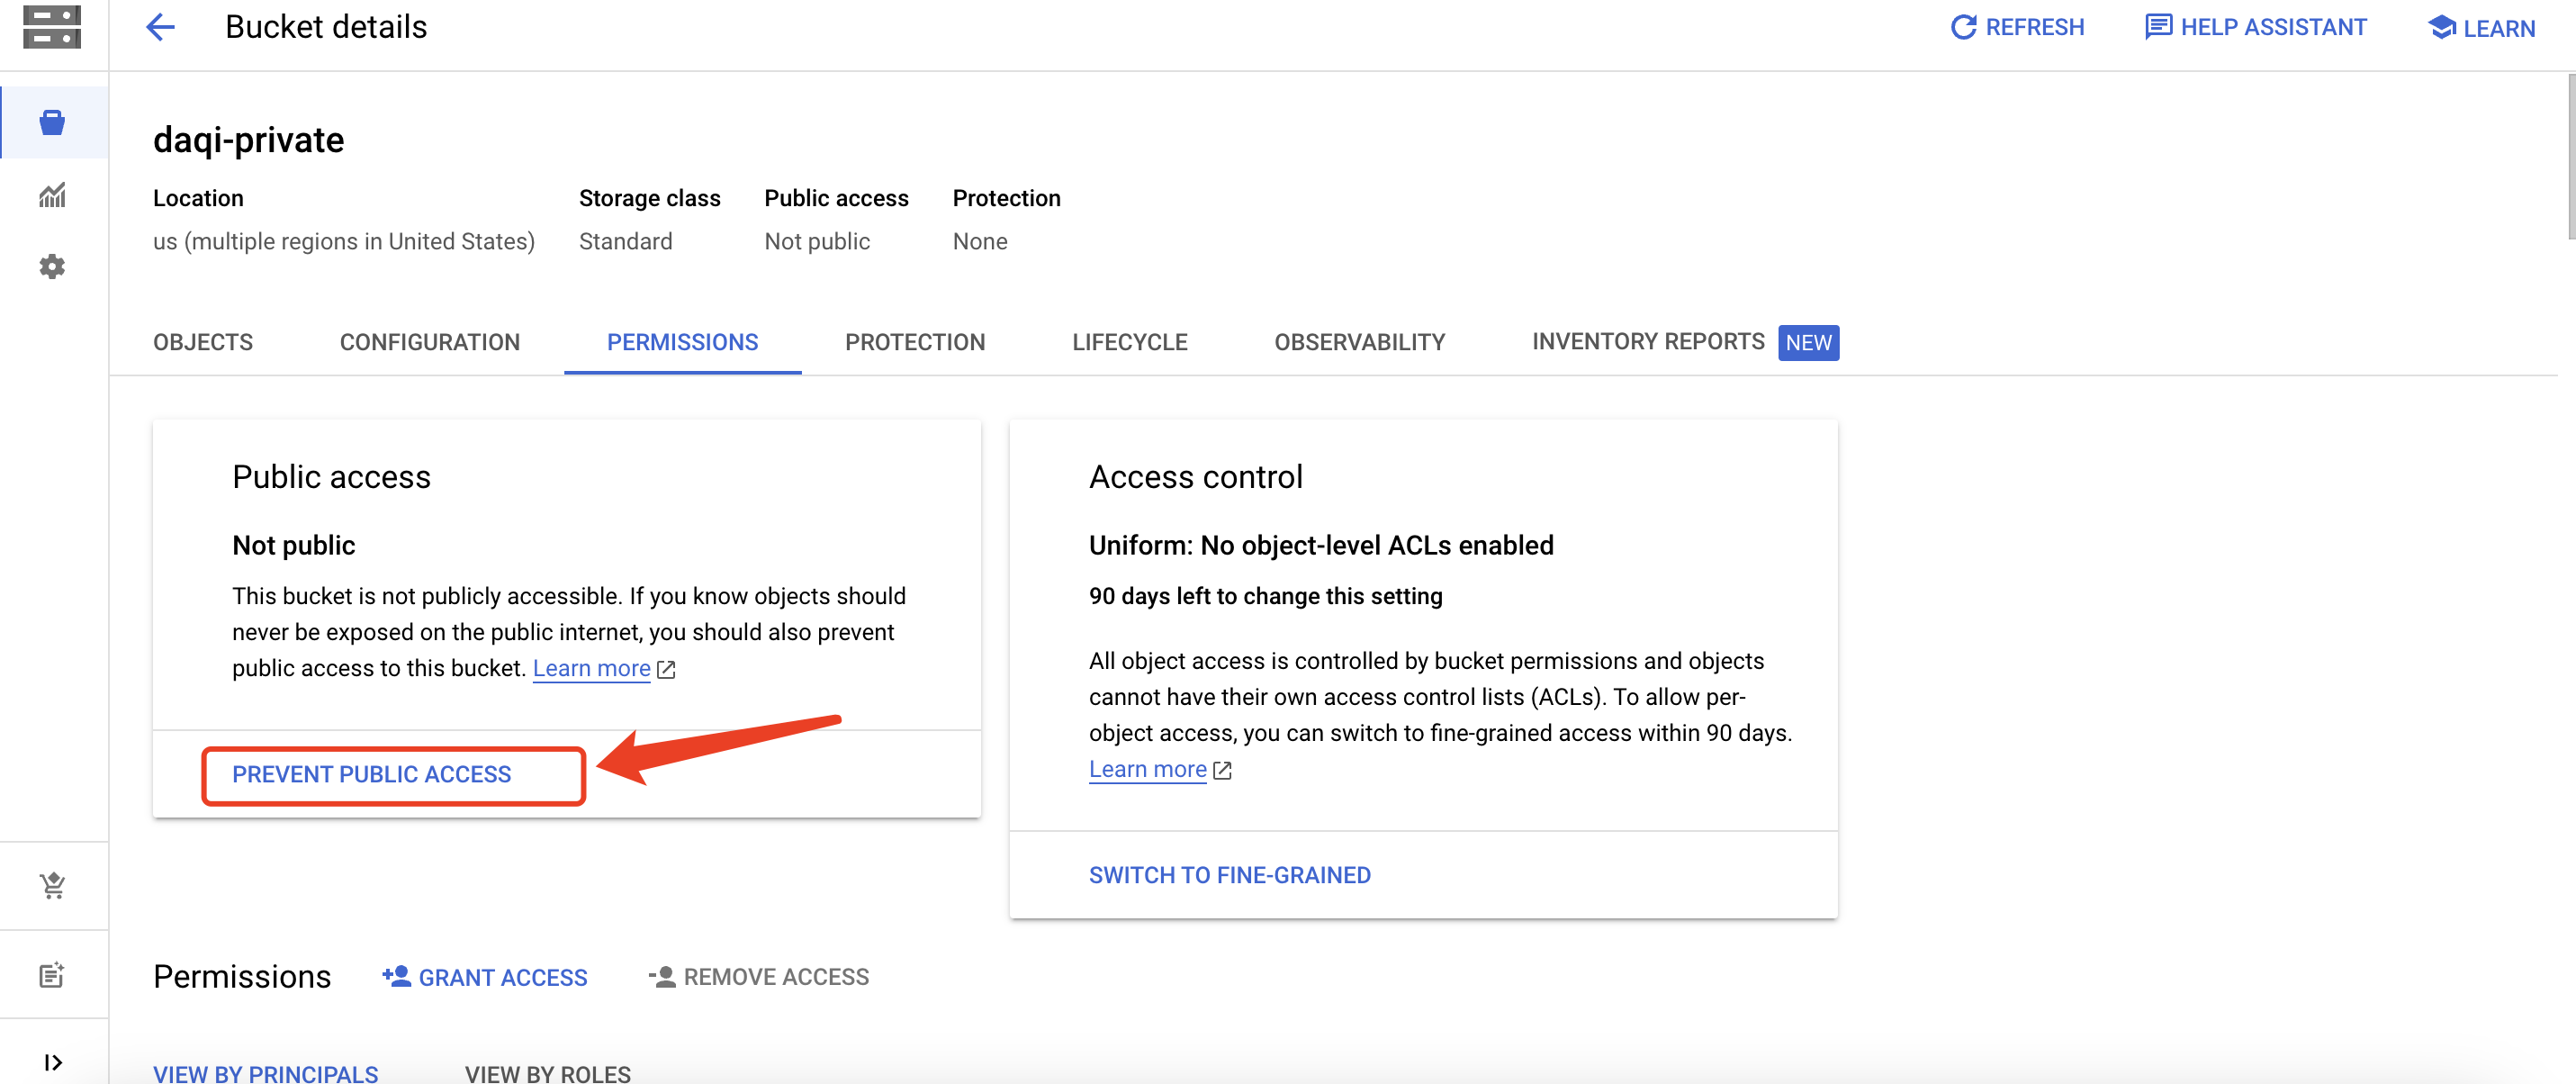
配置存储桶
将已创建好的桶设为私有
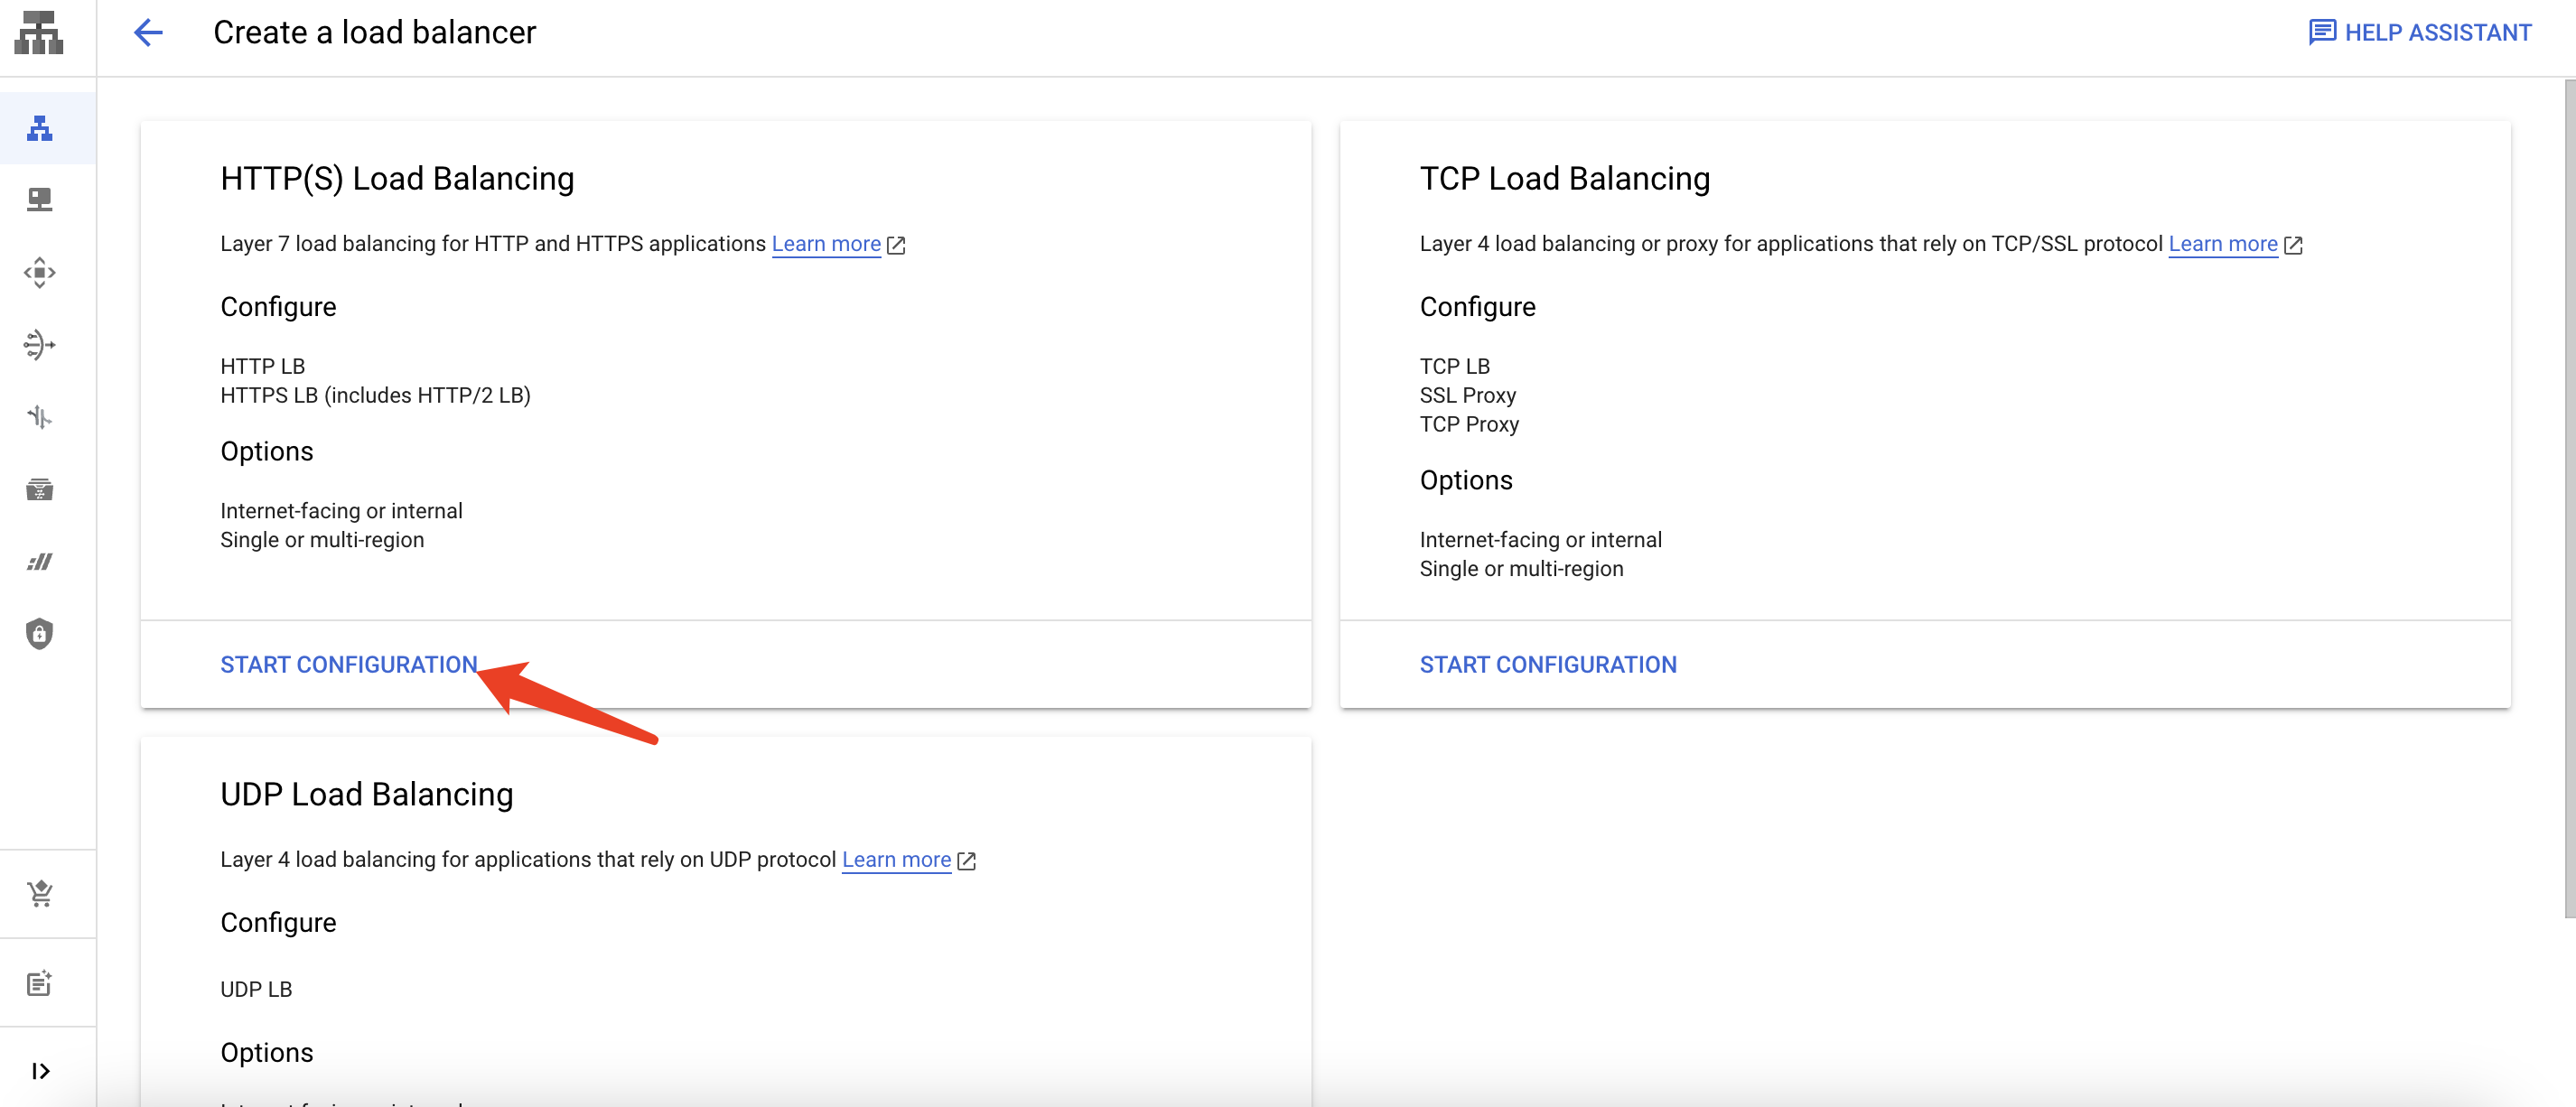
创建HTTP(S)负载均衡,开启CDN
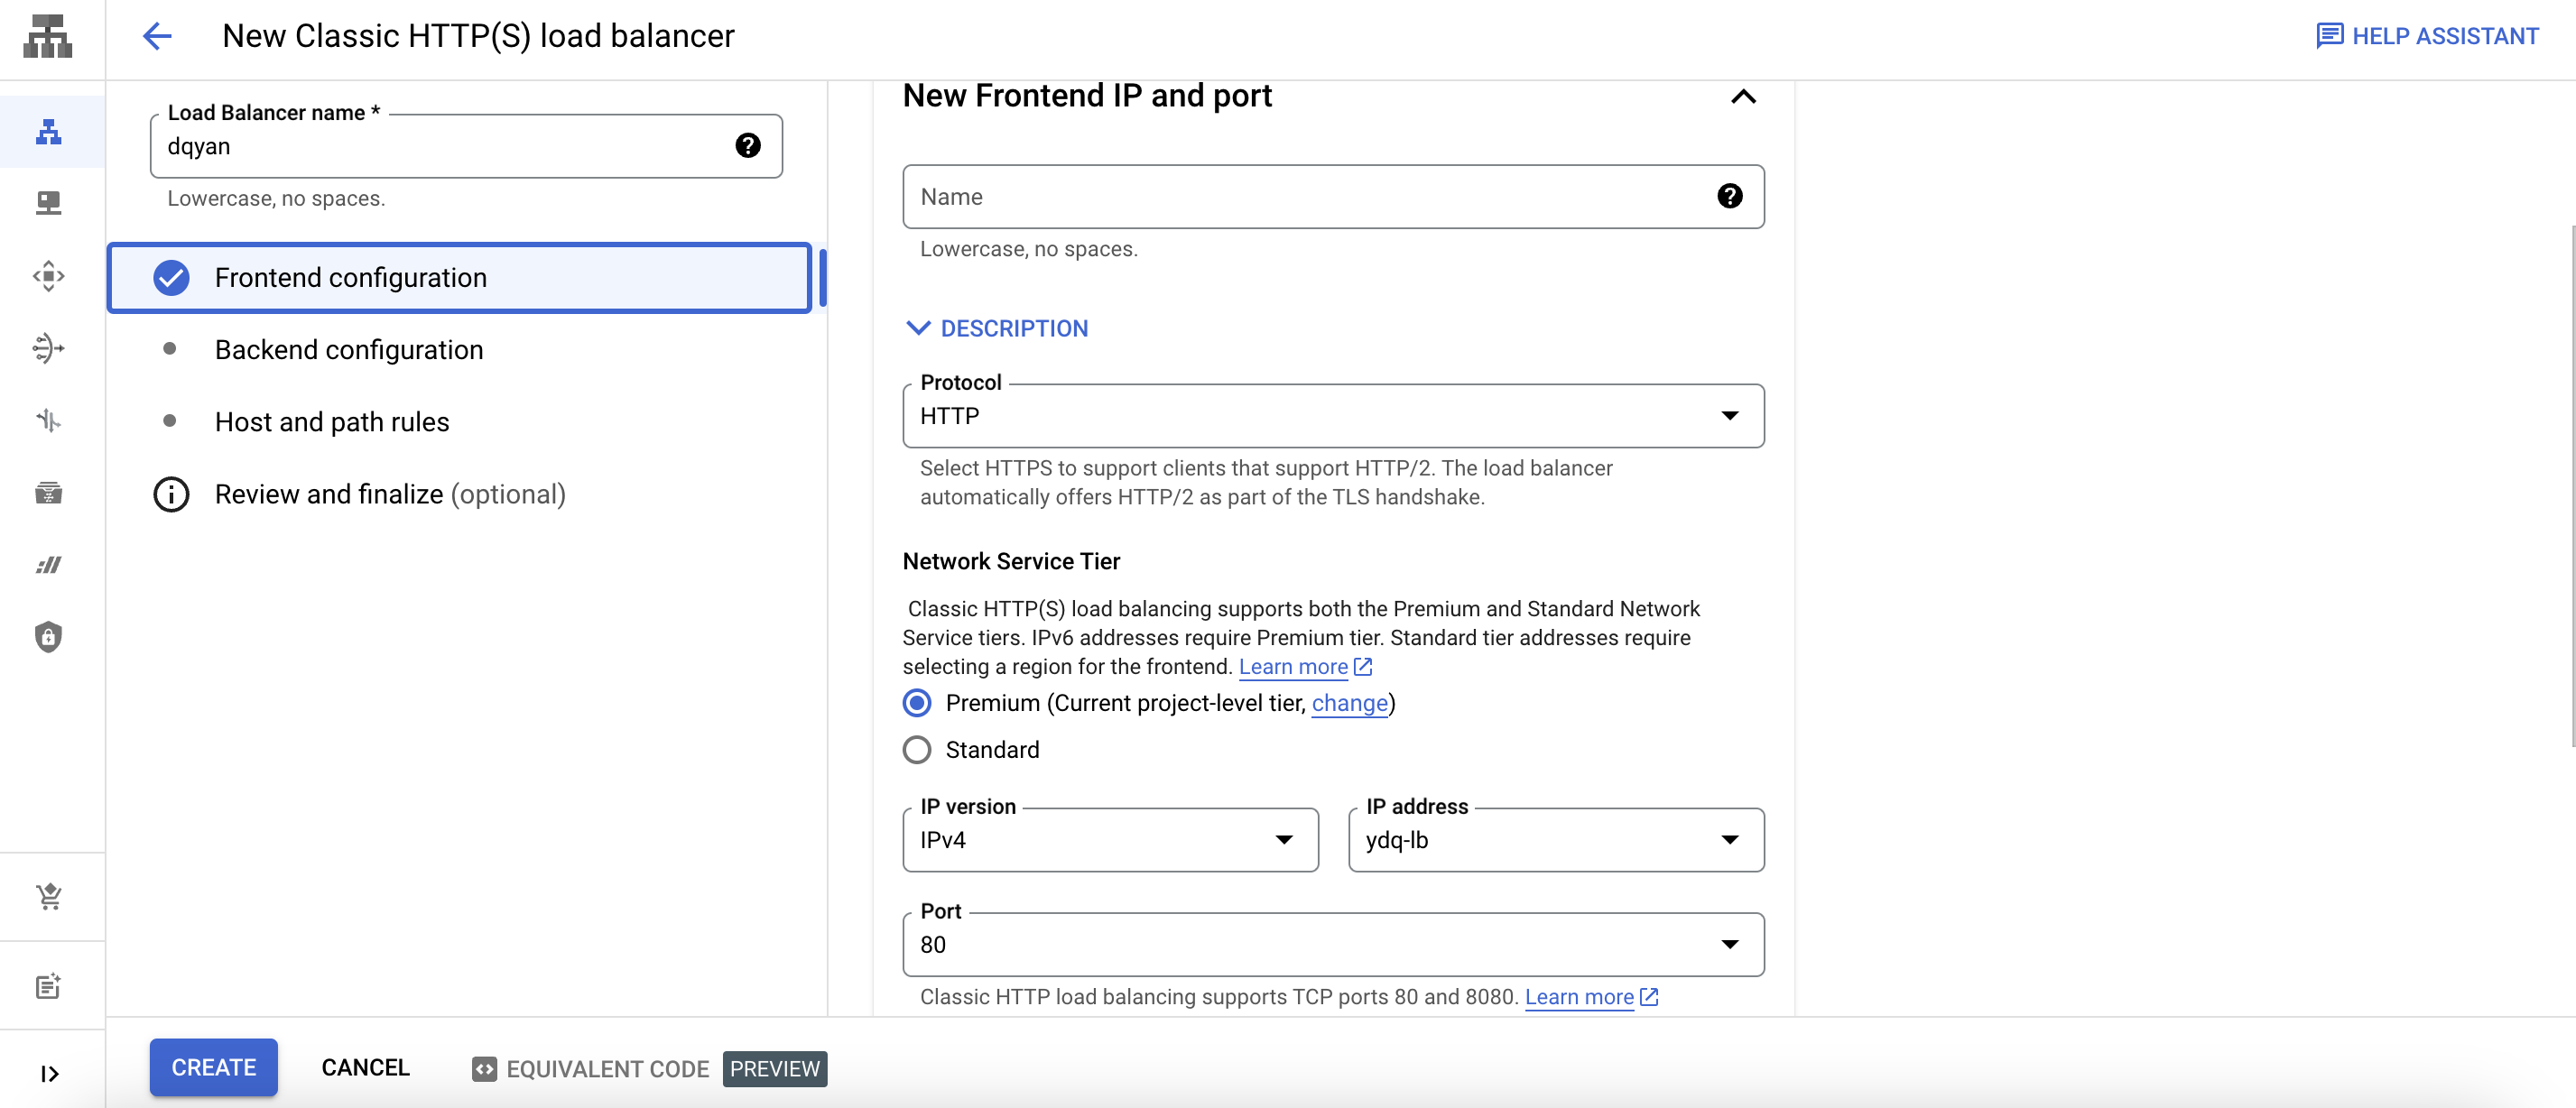
前端配置
注意:网络层级需要选择Premium,否则无法开启CDN
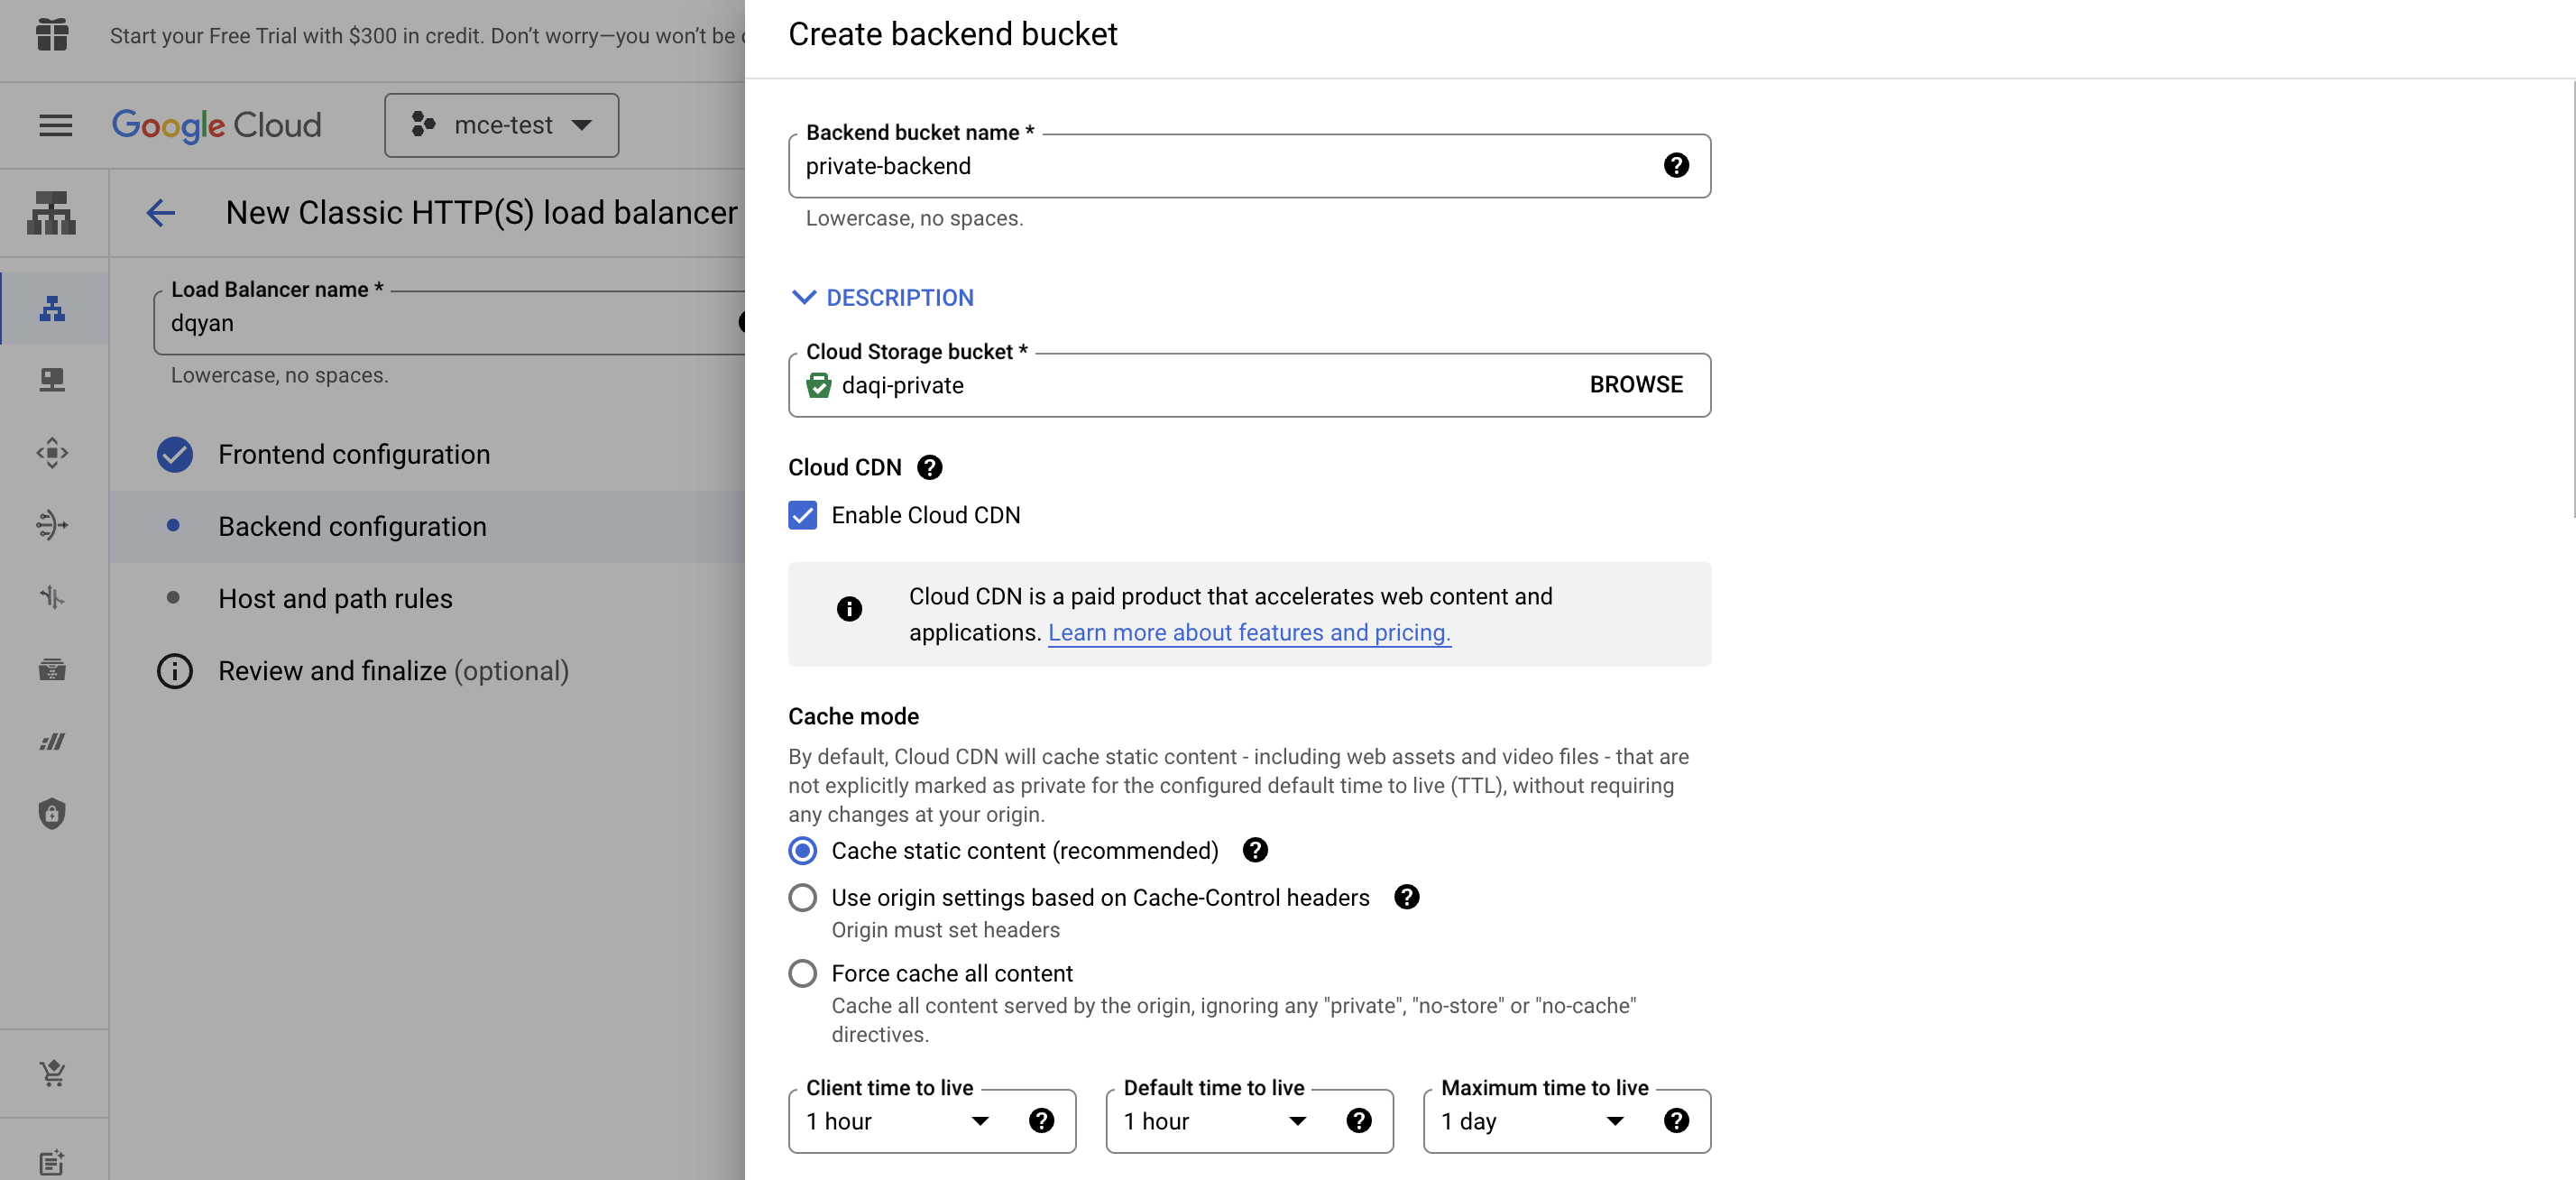
后端配置
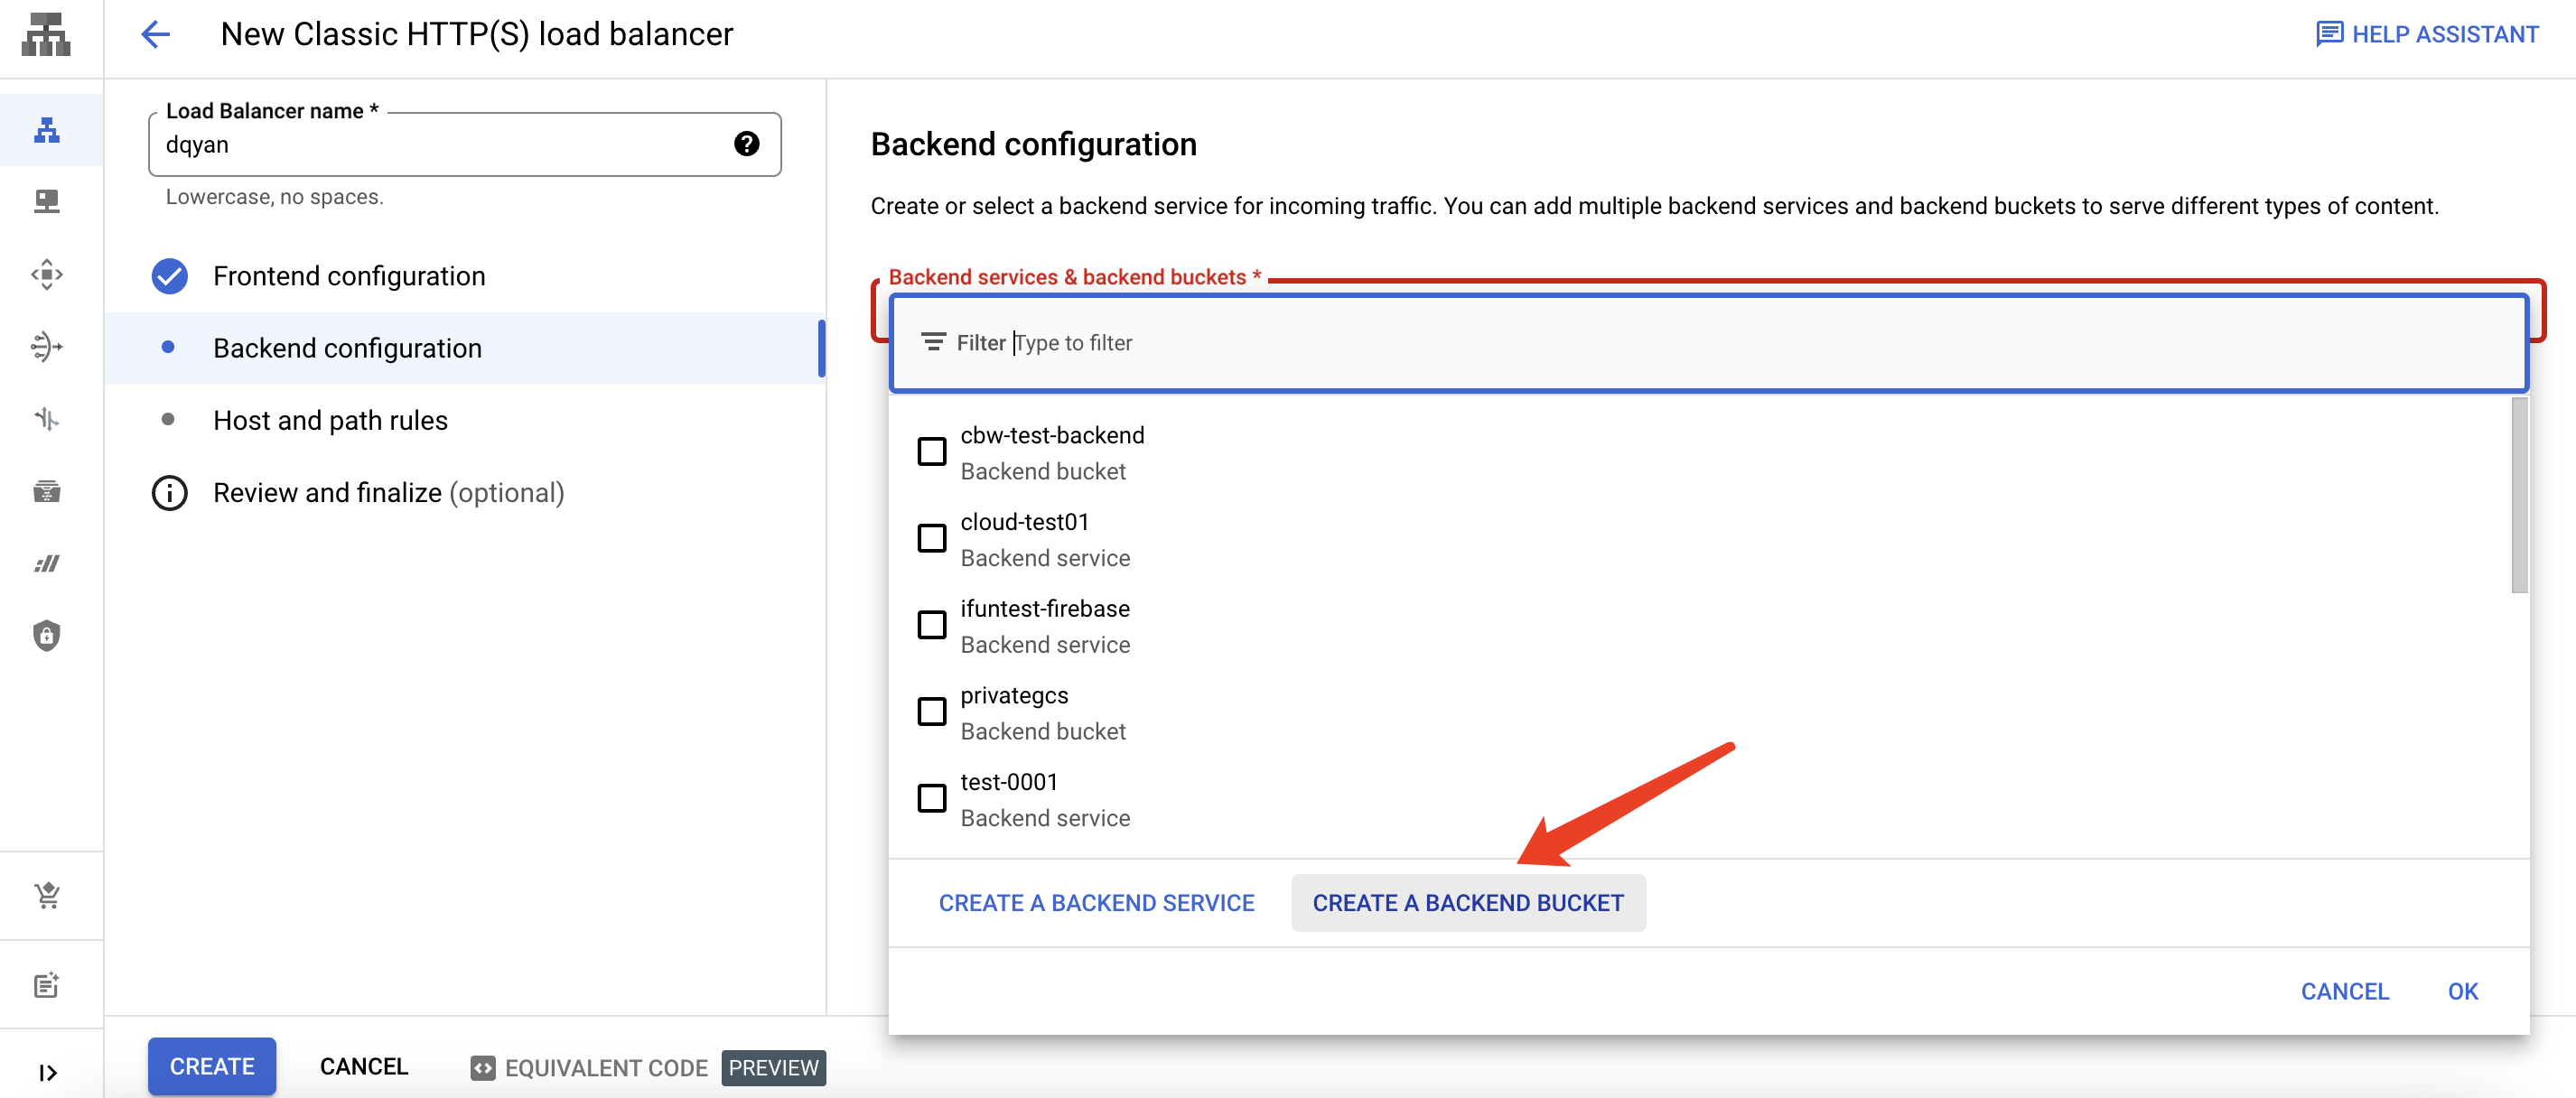
Cloud Storage bucket选择需要作为源站的私有桶
展开Additional configurations,Restricted content 配置选择”Restrict access using signed URLs and signed cookies”
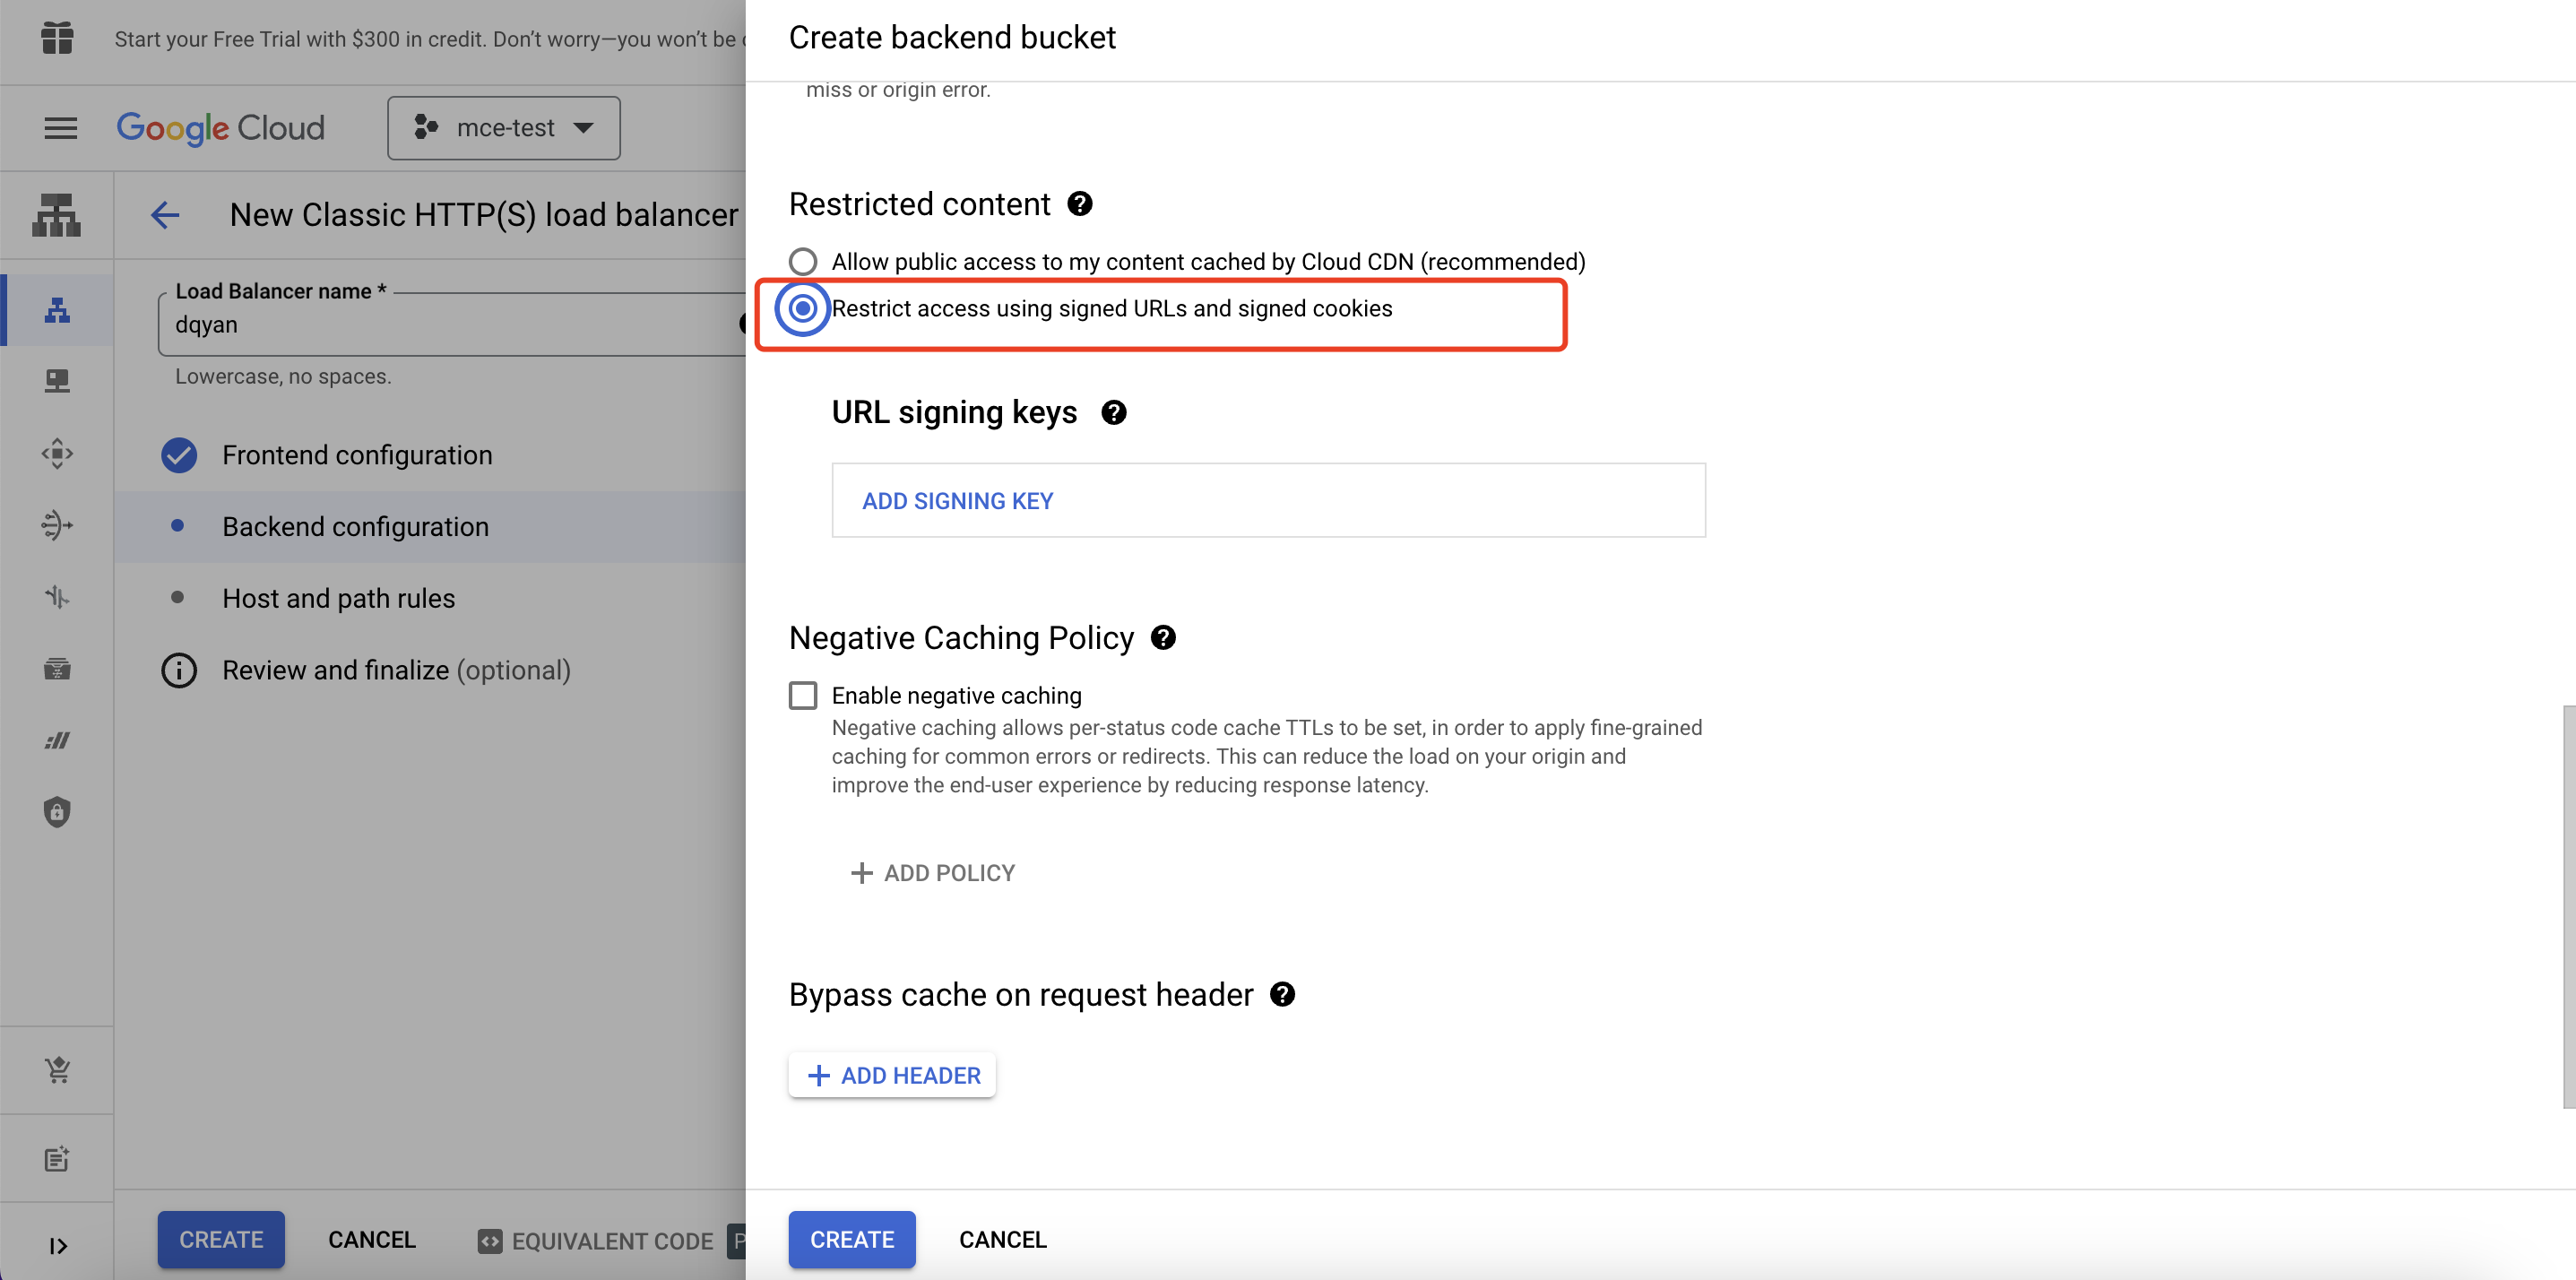
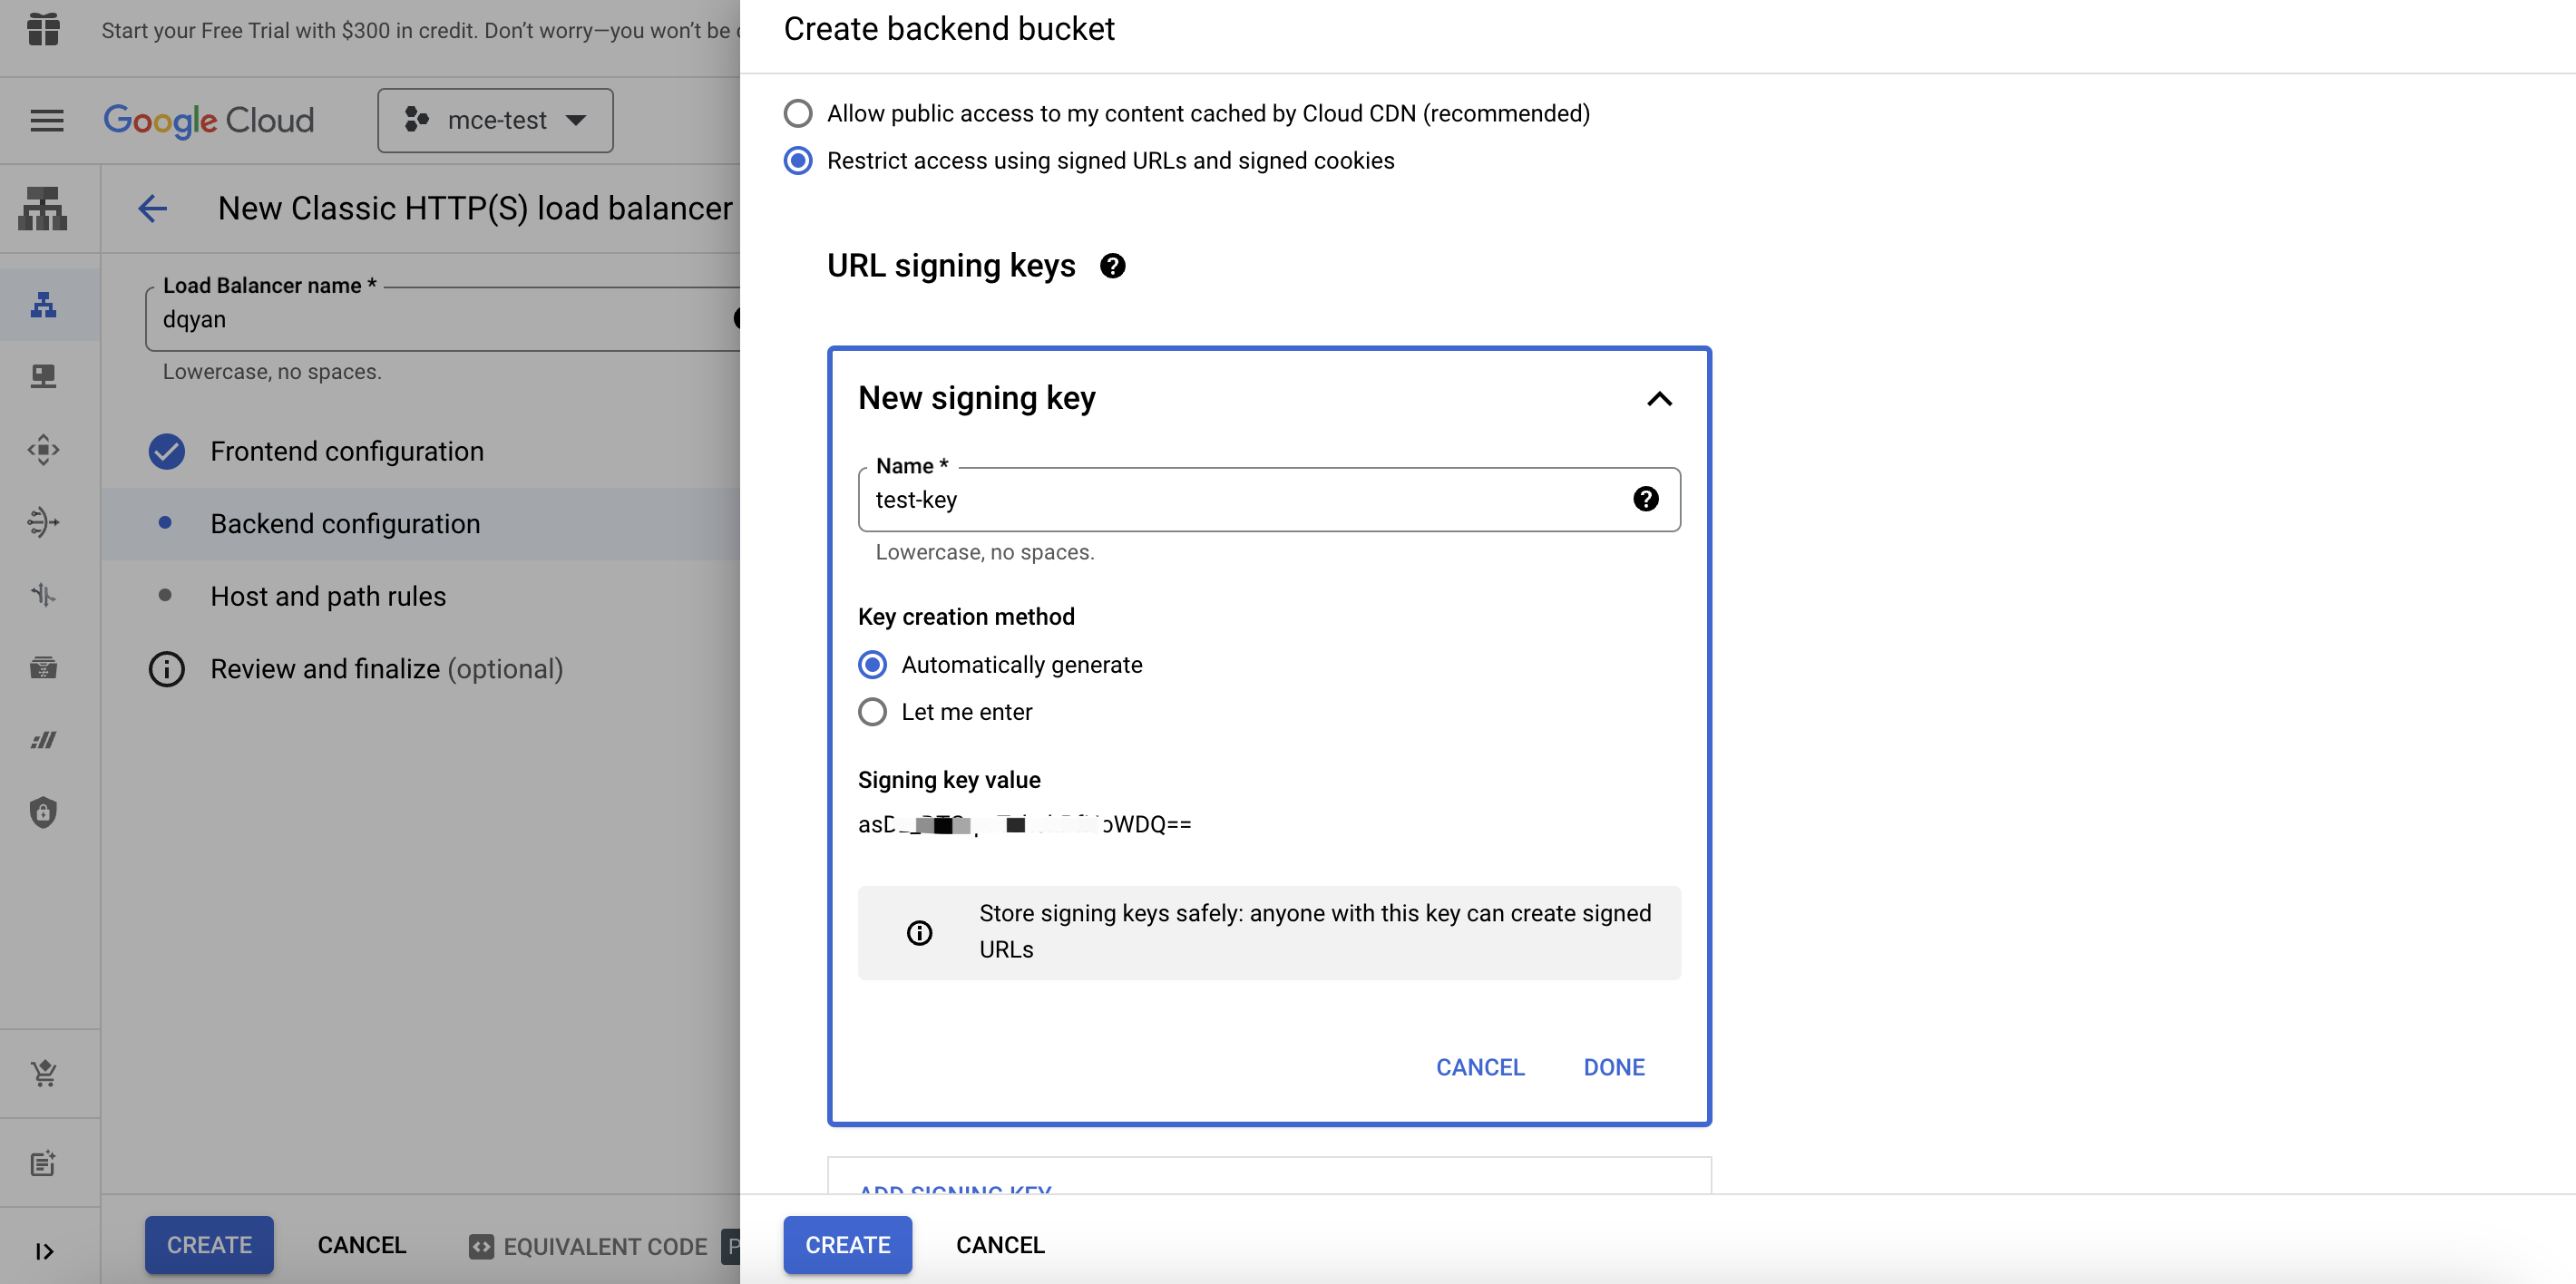
创建URL signing keys,将Signing key value保存到本地文件中,本例保存在/Users/dqyan/key-value
路由配置使用缺省配置即可
点击创建 ,至此LB配置完成
因为私有桶限制了可以读取对象的用户,所以必须向 Cloud CDN 授予读取对象的权限,方法是将 Cloud CDN 服务帐号添加到 Cloud Storage ACL 中。这里无需创建服务帐号。因为首次将密钥添加到项目中的后端存储分区时,系统将自动创建服务帐号。
注意:在运行以下命令之前,请确保已经向项目中的后端存储分区添加了至少一个密钥。否则,该命令会失败并显示错误,这是因为您必须先为项目添加一个或多个密钥,系统才会创建 Cloud CDN 缓存填充服务帐号。
执行以下命令:
gsutil iam ch
serviceAccount:service-<PROJECT_NUMBER> @cloud-cdn-fill.iam.gserviceaccount.com:objectViewer
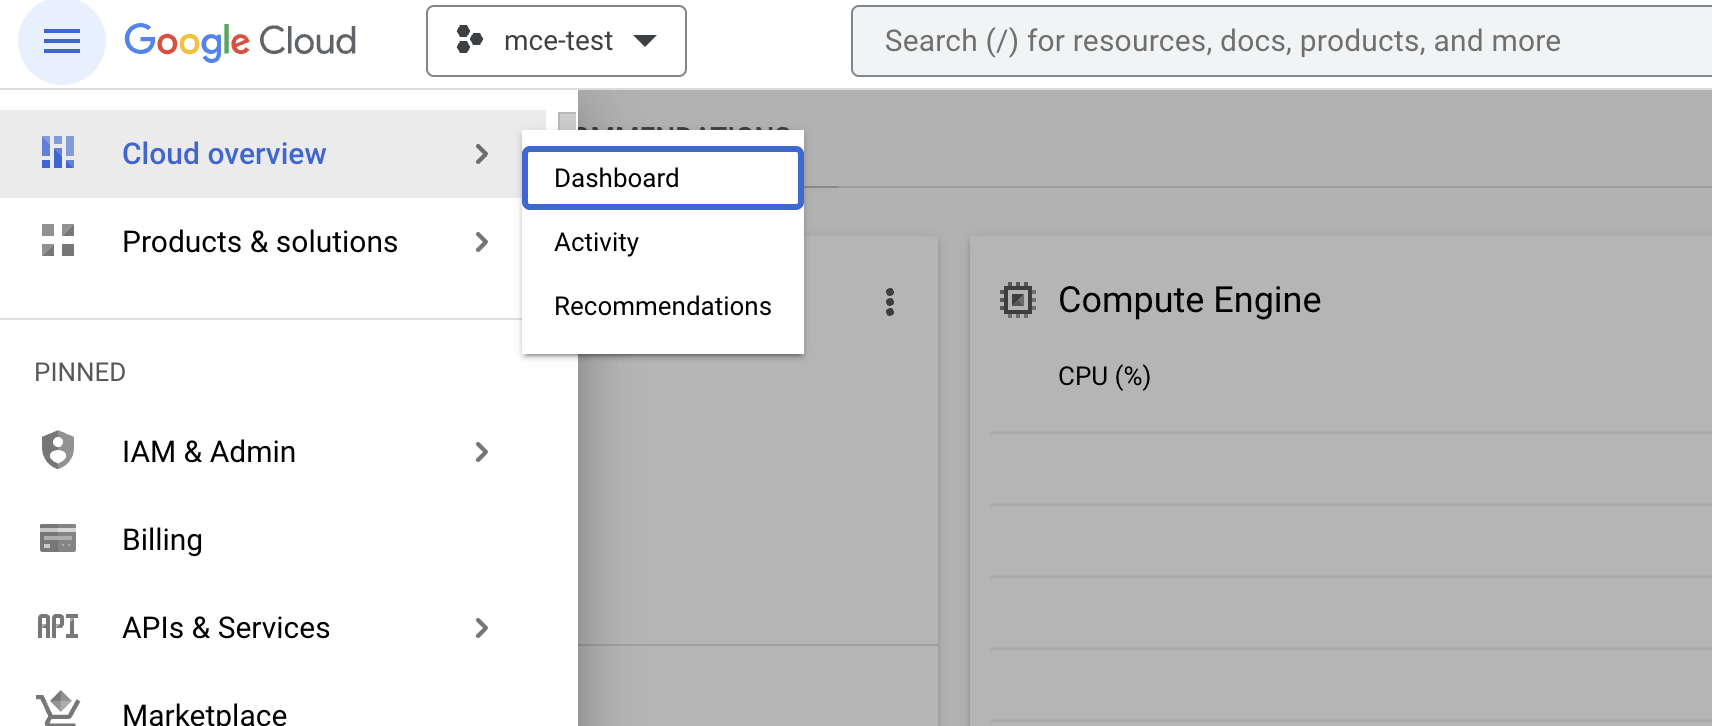
gs://daqi-private<PROJECT_NUMBER> 替换成资源所在项目的项目号,项目号可以在控制台上如下位置找到。
访问测试
上传一张测试图片到存储桶
此时我们先访问测试发现访问返回403
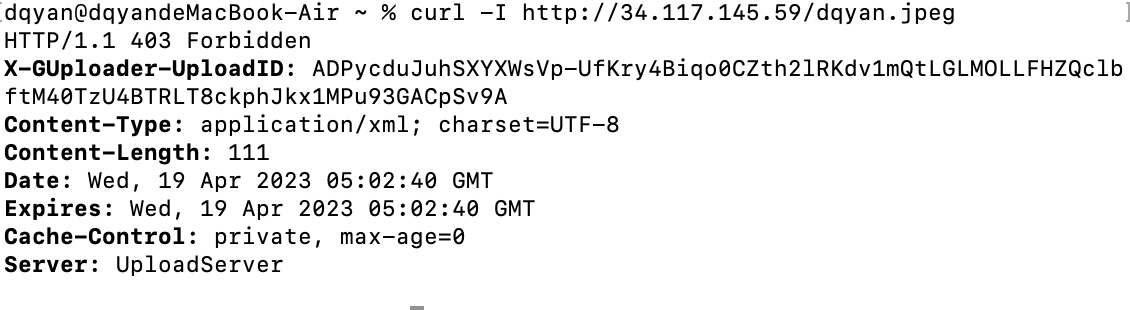
因为访问请求中不带有 URL 签名,Cloud CDN 不做签名验证而将请求直接发给源站 Cloud Storage,但是 Cloud Storage 不允许不经过 URL 签名验证的请求访问其私有文件,因此拒绝访问。
创建签名URL
gcloud compute sign-url
  "http://34.117.145.59/dqyan.jpeg"
  --key-name test-key
  --key-file key-value
  --expires-in 30m
  --validate
执行后会返回签名url,使用返回的URL访问测试
携带签名访问测试
注意:如果是用curl访问测试,查询参数符号前记得加””
curl -I http://34.117.145.59/dqyan.jpeg?Expires=1681906459&KeyName=tests-key&Signature=4INg-niG21Y1K6MN7YmpfJ9tYl8=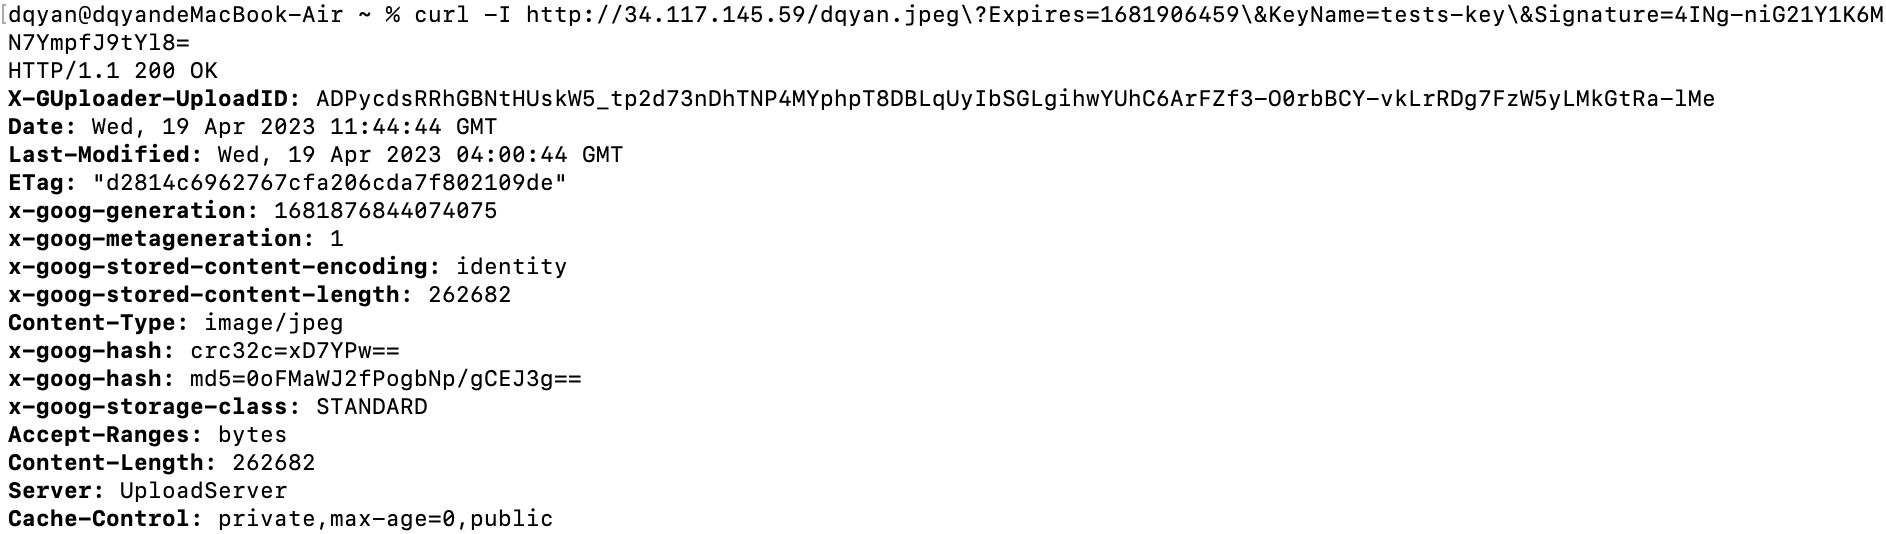
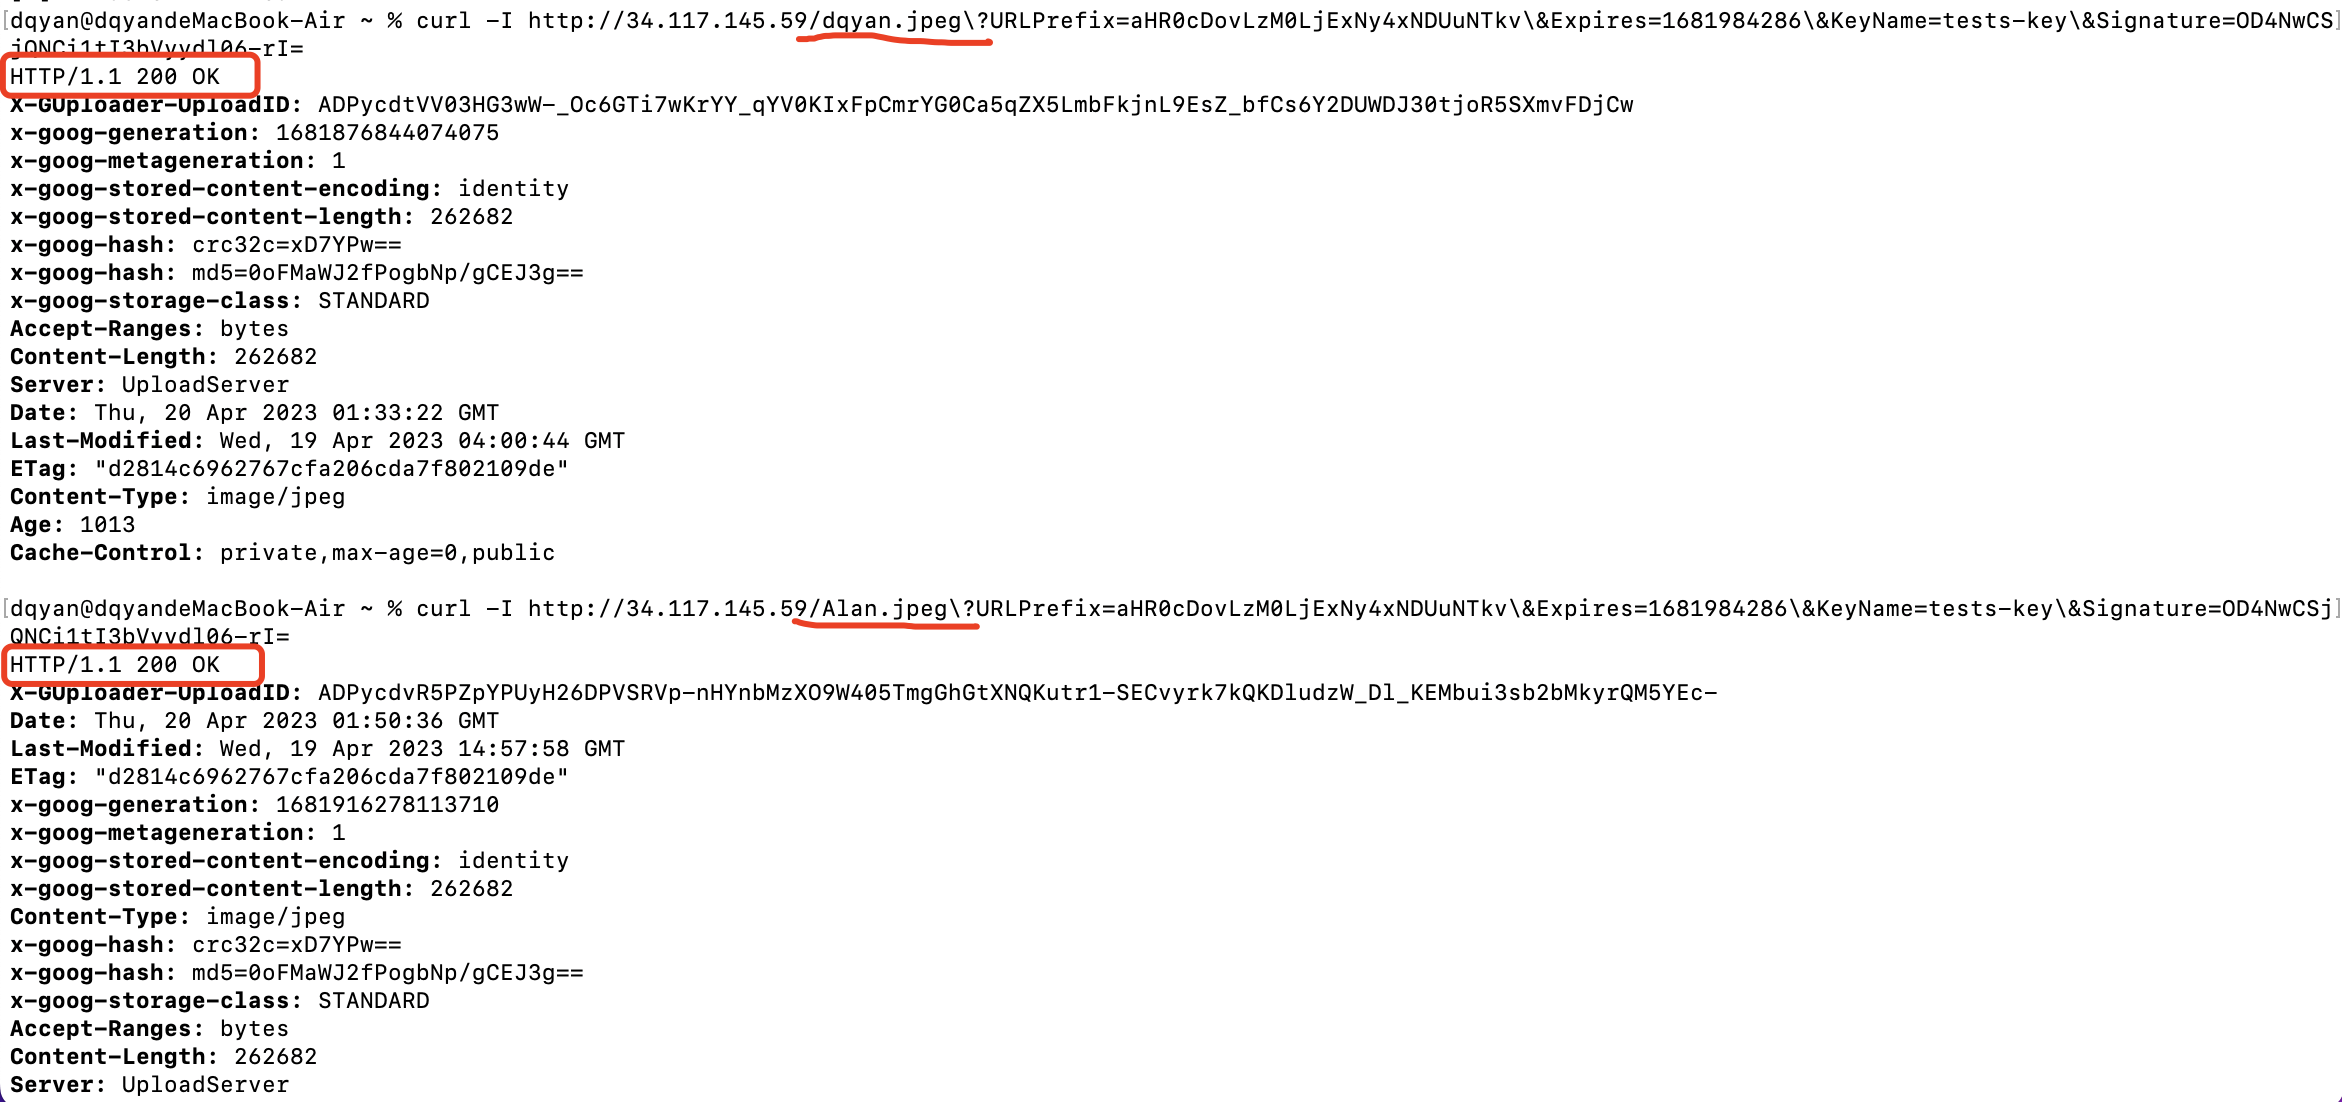
使用 URL 前缀签名
为签名URL使用URL前缀,这样就不必为带有 Expires 和 KeyName 查询参数的完整请求网址签名,而是可以仅对 URLPrefix、Expires 和 KeyName 查询参数进行签名。这样一来,您就可以在多个与 URLPrefix 相匹配的网址中重复使用 URLPrefix、Expires、KeyName 和 Signature 查询参数的给定组合,而不需要为每个不同网址创建一个新签名。
Python代码示例
def sign_url_prefix(url, url_prefix, key_name, base64_key, expiration_time):
    """Gets the Signed URL string for the specified URL prefix and configuration.

    Args:
        url: URL of request.
        url_prefix: URL prefix to sign as a string.
        key_name: name of the signing key as a string.
        base64_key: signing key as a base64 encoded string.
        expiration_time: expiration time as a UTC datetime object.

    Returns:
        Returns the Signed URL appended with the query parameters based on the
        specified URL prefix and configuration.
    """
    stripped_url = url.strip()
    parsed_url = urllib.parse.urlsplit(stripped_url)
    query_params = urllib.parse.parse_qs(
        parsed_url.query, keep_blank_values=True)
    encoded_url_prefix = base64.urlsafe_b64encode(
            url_prefix.strip().encode('utf-8')).decode('utf-8')
    epoch = datetime.datetime.utcfromtimestamp(0)
    expiration_timestamp = int((expiration_time - epoch).total_seconds())
    decoded_key = base64.urlsafe_b64decode(base64_key)

    policy_pattern = u'URLPrefix={encoded_url_prefix}&Expires={expires}&KeyName={key_name}'
    policy = policy_pattern.format(
            encoded_url_prefix=encoded_url_prefix,
            expires=expiration_timestamp,
            key_name=key_name)

    digest = hmac.new(
            decoded_key, policy.encode('utf-8'), hashlib.sha1).digest()
    signature = base64.urlsafe_b64encode(digest).decode('utf-8')

    signed_url = u'{url}{separator}{policy}&Signature={signature}'.format(
            url=stripped_url,
            separator='&' if query_params else '?',
            policy=policy,
            signature=signature)

    print(signed_url)
Github:
https://github.com/GoogleCloudPlatform/python-docs-samples/blob/HEAD/cdn/snippets.py 执行结果:
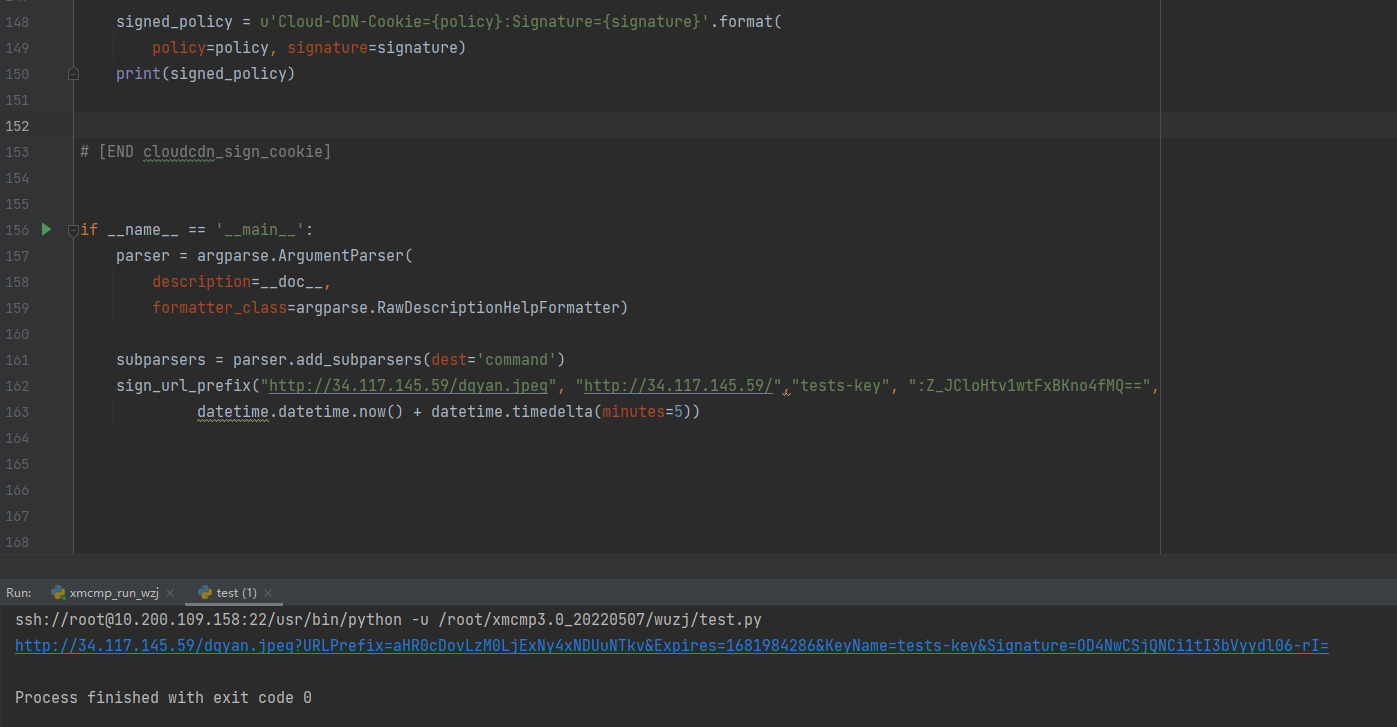
利用产生的签名来请求两个不同文件 dqyan.jpeg和Alan.jpeg。 查看结果均请求成功